Work requests created from Event Manager tasks
The Event Manager and Asset Essentials integration will allow Event Manager Tasks to be submitted as Asset Essentials Work Requests. This creates a seamless communication experience between your departments which allows for work to be completed quickly and efficiently. A task must be created in Event Manager in order for it to be submitted as a work request in Asset Essentials. *Note: Not all clients are eligible for this integration. To learn if you are eligible, contact Client Services.
How to manage a work request created from a task
- Be sure you are logged in to Asset Essentials before managing your work request that was created from a task in Event Manager.
- Filter your work order list to navigate to the work request created from the task.
- Click the Work Orders menu icon then select Work Orders.
- Click the Columns button.
- In the window that displays, select Work Order Fields.
- In the list of fields, check the box next to Generated From and click Apply.
- In the Generated From column, click the drop-down menu and select Event Manager.
- Continue to filter the work order list to find and select the appropriate work request.
Bright Idea:We recommend creating a View for your work order summary list that will allow you to quickly navigate to all of your Event Manager work requests.
- Click the Columns button.
- In the window that displays, select Work Order Fields.
- In the list of fields, check the box next to Generated From and any other important fields you would like to see on your summary view.
- Click Apply.
- In the Generated From column, click the drop-down menu and select Event Manager.
- Click the View drop-down menu and select New.
- Enter a Name for the View such as, Event Manager Requests.
- If you would like your new Event Manager view to be the primary view that displays automatically when navigating to the work order summary page, check the Set as My Default box.
- If you would like other users to access your new Event Manager view, check the Available to others box.
- Click OK at the top of the window to save your View.
- The work request will have various fields populated with information based on the details recorded on the task in Event Manager.
- Title: The title will match the Task Name.
- Work Requested: This field will include the Task Description.
- Expected: The expected date will match the Due Date on the task.
- Generated From: This field will confirm that the work request came from Event Manager.
- Created: The created date will match the date the task was created.
- Comments: This field will include additional information from the task such as the Event Manager user that is assigned to the task. *Note: The Asset Essentials user processing this work request will need to manually assign it to the appropriate user.
- Review the work request and record additional details as needed.
- Process the work request based on your Asset Essentials workflow in order to approve and assign the work order.
- To view and manage the task associated with the work order, you will need to log in to Event Manager and search for the task. *Note: The only fields on the task in Event Manager that will show Asset Essentials data are the Work Order number and the WO Status: Request. The task must be managed and completed manually in Event Manager.
How to report on work orders created from tasks
- To report on the work orders created from tasks in Event Manager, start by filtering your work order list to show work orders from Event Manager.
- Click the Work Orders menu icon then select Work Orders.
- Click the Columns button.
- In the window that displays, select Work Order Fields.
- In the list of fields, check the box next to Generated From and click Apply.
- In the Generated From column, click the drop-down menu and select Event Manager.
- You can continue to filter the work order list, if necessary, to help narrow your report results.
- Click Print/Report at the top of the page and select Report.
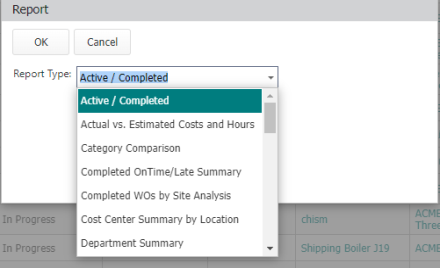
- Choose the appropriate Report Type from the drop-down menu based on the data you need to pull and click OK.


